
Do you love elderberries and want to grow them in your garden? Elderberries are not particularly difficult to cultivate. They can endure various situations, including poor soil and excessively moist locations. The only thing that elderberry plants cannot bear is dryness.
Elderberries require a soil pH between 5.5 and 6.5. Elderberries may grow in various soil types but thrive in wet and well-drained soil. Before planting, work manure or compost into the soil. Elderberry plants should be spaced 6 to 8 feet apart in 10-foot-long rows.
If the answer is yes, this is the exact place where you will find everything you need to know about growing, maintaining, and harvesting Elderberry plants. So now let’s discuss all these factors about elderberry in detail!
When to Plant Elderberry
The optimal time to grow Elderberry is in early April; after all, the cold danger has passed. However, it is recommended to plant early in the morning or late in the evening to avoid the hottest part of the day, enabling your plant to adjust to its new environment with minimal stress.
The next optimal period to plant Elderberry is in early autumn, 6 to 8 weeks before the first freezes, to enable the plant to become established before the onset of cold weather. Ensure that your Elderberry plant receives sufficient water for several weeks while it becomes established.
Where to Plant Elderberry
Elderberries are not particular; however, they prefer slightly acidic, compost-rich soil. The optimal pH range for your soil is between 5.5 and 6.5. Ideal conditions would be sandy, loamy, and well-drained soil. Add some manure or compost to deficient soil before planting.
The plants thrive in moist environments and can endure having their feet wet. I cultivate mine near a fence in a place that retains water. You can buy elderberry seeds to grow in your garden, such as Everglades Elderberry Seeds (on Amazon).
Elderberry Variety
There are numerous Elderberry types commercially available. You can choose the one you find suitable for your garden after learning the details about the varieties of elderberry.
American Elderberry
American or popular Elderberry (Sambucus canadensis) is a native North American plant with small, sour, dark-colored berries and a maximum height of 12 feet.
Based on the variety, the plant can survive in USDA Hardiness Zones 3 to 9. Among the cultivars are ‘Adams Number 1,’ ‘Johns,’ ‘Nova,’ and ‘York.’ Our comprehensive guide explains planting zones.
Black Elderberry
This kind is indigenous to Europe but has grown in a significant portion of Asia and North America. Native to eastern Northern America, the American Elderberry (Sambucus canadensis) is a very related species of black Elderberry.
Blue Elderberry
This plant is indigenous to the western coast of North America, including Mexico and the United States. With its enormous, powdery-blue berries, it is occasionally mistaken for a type of blueberry. This beautiful shrub’s fruits are renowned for their robust flavor.
This type distinguishes itself from others in that it thrives optimally from seed. It is particularly suited for Zones 3 through 10 because it prefers warmer climates. Under optimal growing conditions, it can grow to a height of 10 to 30 feet and a width of 18 feet at maturity.
European Elderberry
European elderberries are significantly higher than their American counterparts, reaching heights of up to Twenty feet. They are hardy in USDA plant hardiness zones 4 to 8.
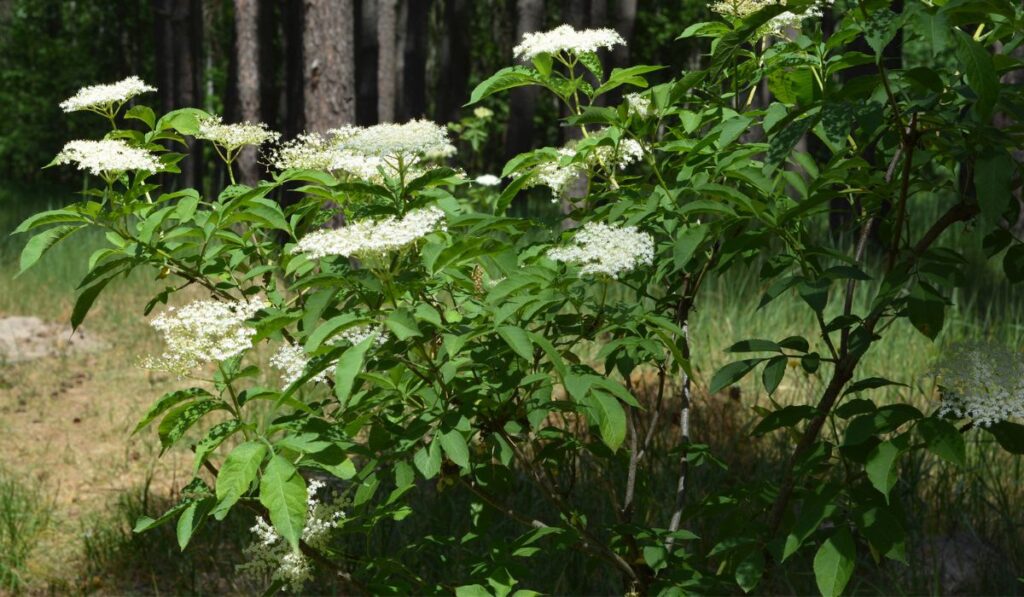
The majority of people cultivate European elderberries due to their attractive leaves. However, they do grow berries, and the harvest will be greater if you grow a second bush nearby.
In their 2nd or 3rd year of development, bushes begin producing fruit. Several elderberry kinds are self-fertile, but two or more bushes increase yield.
How to Plant Elderberry
Elderberries are easy to cultivate if they are grown in the proper environment. They thrive in constantly wet, nutrient-rich soils. They can endure frequent drought and temporarily moist soils, but they are unsuitable for sandy or swampy locations.
Regarding pH, the soil can be acidic or alkaline, although somewhat acidic (5.5 to 6.5) is optimal. Elderberries produce the greatest blossoms and fruit when grown in full sun. However, if you’re raising the plant for its ornamental foliage, some shade is acceptable.
Three growing seasons are needed to develop a hedgerow with planting intervals of 1 meter in the row and 4-5 meters between rows. In residential gardens, plants may be closer together, with at least 2 meters in either direction between each plant.
Planting should occur early in the spring. The depth at which elderberry plants are planted may differ so long as the roots are adequately protected and the soil is thoroughly compressed. However, it is advisable to plant them at the same depth as in the nursery.
Irrigation at or just after planting will enhance initial root development and future plant growth.
Furthermore, elderberry plants grow in well-drained, non-stagnant water-prone areas. Therefore, your planting site must be well-drained. If not, your plants will be susceptible to root rot.
Additionally, elderberries love loamy soils. Therefore, you must ensure that the soil is sufficiently loamy for the plant. If your growing site has sandy soil, the remedy is to add a few inches of organic matter. You can achieve fantastic results by using a fertilizer with a 10-10-10 ratio, or you can compost in the early spring of each year.
Harvesting Elderberries
The main labor-intensive aspect of elderberry ownership is fruit harvesting. It is simple to remove the berries from the plant. The remainder, though, requires some expertise.
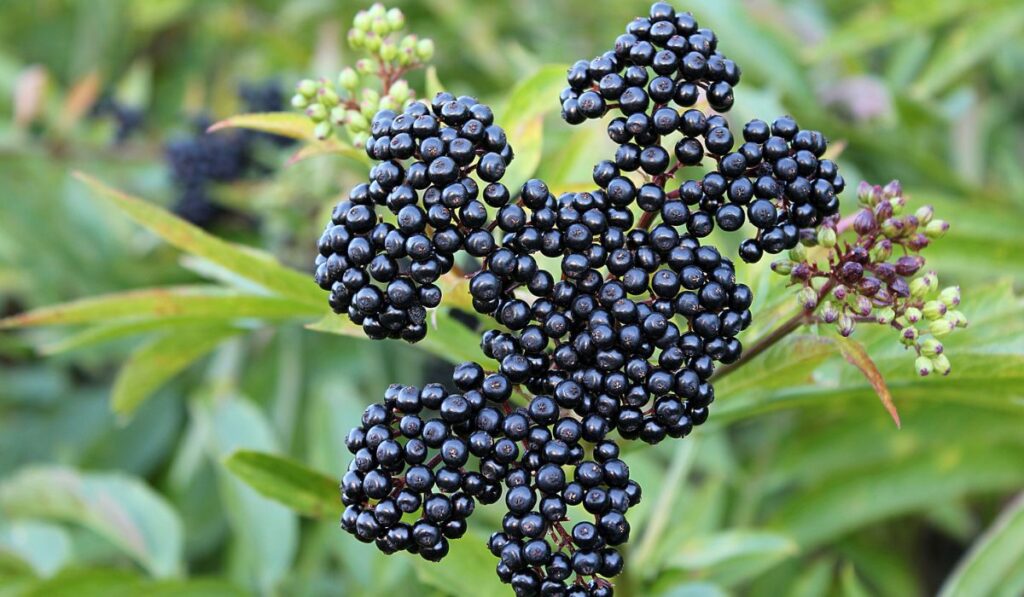
You should pluck the berries when they are as dark purple or perhaps black as you can imagine them becoming. They should be incredibly tender and juicy.
Elderberries can be harvested beginning in the second season. Elderberry fruits typically ripen between mid-August and mid-September, at which point they turn a dark purple color.
Typically, elderberries fresh from the bush are sour. Clusters ripen between 5 to 15 days. Therefore, the quickest method for harvesting elderberries is to apply scissors to cut the entire cluster off the plant and then pick the individual berries. The average annual yield per plant is between 12 and 15 pounds.
Occasionally, berries might appear purple on the outside but remain unripe on the inside. Try pressing fruit and inspecting its juice to determine if it is fully ripe. If it is complete, it will be a dark purple color. Unripe berry juice appears pale and watery.
It is advisable to perform this test on one or two berries from each cluster you harvest.
Maintaining Elderberry Plants
Maintenance of elderberry plants isn’t difficult if you take care of certain factors. These include sunlight, water, and fertilizers.
Light
American Elderberry may be planted in various sun exposures, making it a perfect choice for practically any yard or landscaping area. Though it can tolerate any conditions, it likes full sun or partial shade.
Fertilizer
Although fertilizer for your American elderberry plants is not mandatory, it is an excellent strategy to promote abundant fruit production. Consider adding manure or compost to the soil before planting your shrub to boost its nutrient content. In addition, fertilize your bush with a 10-10-10 fertilizer mixture every spring.
Irrigation
Ensure that the area where you will be planting has access to water for irrigation, and then place the primary irrigation lines and headers before you begin planting. If you are utilizing drip tubing with in-line emitters, cover the tube to prevent crushing plants later on.
Even if emitters must be manually inserted into tubing, it may be easier to wait until after planting and install them near plants directly.
Pruning
Elderberry pruning is essential for the plant’s health, look, and ensuring continued fruit production. Allow the elderberries to develop naturally for the first two to three years, with the option of removing diseased or broken canes.
Afterward, routinely clip the elderberry bush to make place for new, robust canes. As canes age, they become less productive.
You can buy pruning gear like Fiskars 15 Inch PowerGear Super Pruner (on Amazon) to perform it properly.
Propagating Elderberries
There are elderberry plants for sale. However, it is so simple to reproduce them from cuttings that there is no reason not to try. Moreover, if you’re new to rooting cuttings from trees and bushes, you’ve chosen the ideal plant, to begin with.
Propagation of elderberries can be done by soaking the cuttings of elderberries for 6 to 8 weeks in water in the spring. If you dislike the water approach, you can alternatively let them sit for six weeks in a miniature greenhouse.
After the elderberry cuttings have developed robust roots, transfer them to your garden so they can flourish permanently. Before you root your elderberry cuttings, you must choose a location and prepare the soil.
Make a hole and bury the cutting so its base is flush with the soil line. Several elderberries should be separated by 6 to 10 feet (2 to 3 meters) to allow each plant to spread 6 to 8-foot (2-2.5-meter).
Conclusion
Elderberries can grow in various soil types but thrive in moist, fertile, and well-drained soil. Choose a sunny location. Work manure or compost into the soil before planting. In 10-foot-long rows, elderberries should be placed 6 to 8 feet apart.
Plant two inches deeper than the nursery’s layout. Soak the plant’s roots with care. Elderberries are not especially challenging to cultivate.