
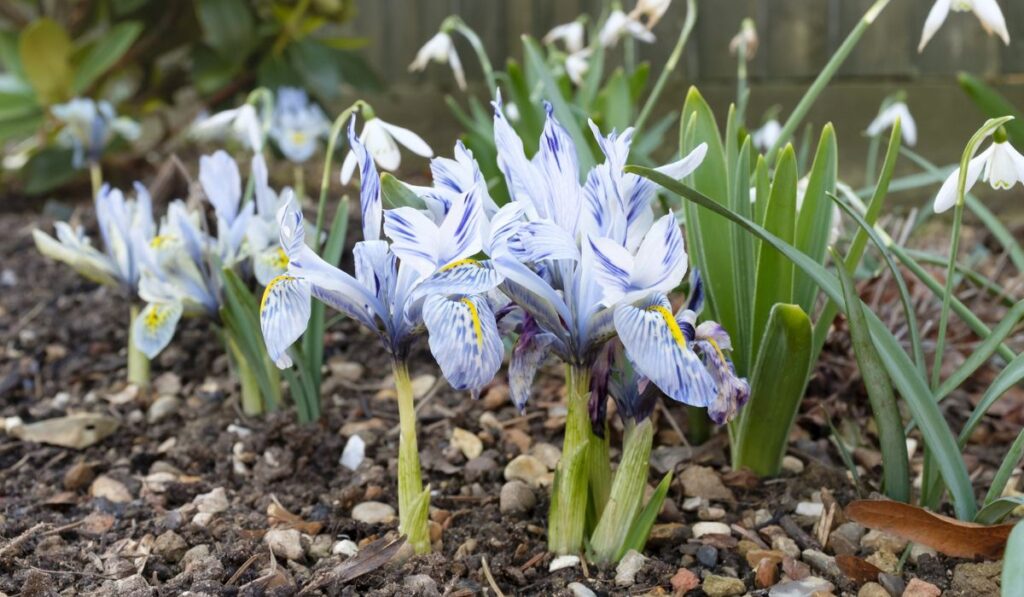
Colorful and classy, iris flowers are a favorite of gardeners all over the globe. Although they’re best known for their beauty, many people don’t realize that these regal flowers are actually quite easy to grow as well. If you’ve been thinking about planting some iris bulbs of your own, this guide is for you.
Iris bulbs are planted from late summer through fall, and the plant blooms in the next spring. Irises love full sun, but can tolerate partial shade. They grow pretty large, so make sure to give them enough space. Irises are fast spreaders so they must be divided every few years to keep them healthy.
If you’ve got a spot in your garden that could use some color, why not give irises a try? There are over 250 species in a vast color palette, so you’re sure to find one that’s perfect for your space. Let’s take a closer look at when, where, and how to plant iris bulbs.
What’s the Best Month to Plant Irises?
Iris rhizomes, or the roots that the plant grows from, should be planted in the late summer or early fall, usually July and August, or even in September if you live in a warmer climate.
This allows the roots to establish themselves before the iris enters its winter dormancy. Any later than September, and you run the risk of rot setting in before the plant has a chance to take hold.
How to Plant Iris Bulbs: All You Need to Know
The genus Iris is made up of over 250 species. Most of these irises are grown from rhizomes — thick, fleshy roots that store nutrients for the plant. Some species, however, grow from bulbs. The difference is important to know because the two types of plants have different planting requirements.
Dutch iris (on Amazon) is the bulbous variety. It produces smaller, more delicate flowers than the rhizomatous types and has a shorter blooming period. But, because they grow from bulbs, they bloom earlier. Plus, they bloom twice, in the spring and fall, so the bulb can be planted either in fall or early spring.
On the other hand, Rhizome irises are more common. All dwarf and tall bearded verities, Siberian iris, Japanese iris, and Louisiana iris are all rhizomatous. Because they grow from rhizomes, they’re easy to propagate by division. They’re only planted in the fall and need a different planting method than bulbs.
Here’s a step-by-step guide to planting irises from bulbs, with some extra information on planting rhizomes.
1. Pick the Spot
Iris needs full sun to partial shade and well-drained soil. The bulbous dwarf iris can tolerate partial sun but still need at least 5 hours of sunlight daily. They don’t like shading from taller plants either, so if you can, make a separate bed for your irises.
2. Prepare the Soil
Irises give the best blooms when planted in rich, loamy soil that’s been amended with organic matter like aged manure. A little on the acidic side is good too. Ensure the drainage is good because irises wants frequent watering but prefers moist conditions, not waterlogged knees.
3. Planting
Dig a 5-inch deep hole for bulbs, and place the bulb in the hole with the pointy end up. You can decide the distance between bulbs depending on the type of growth you want, but usually 4-5 inches apart is a good rule of thumb. Cover the bulb with soil and water it in well.
For rhizomes, dig a wide space about 4 inches deep. Rhizomes need to be straight, so make a small ridge with soil in the center to hold the rhizome in place. Place the rhizome on the ridge so that roots are spread out in all directions.
You can plant 2-3 rhizomes in a single hole if they’re not too crowded. However, keep 12-18 inches distance between different planting holes. Fill in the hole with soil, leaving the top of the rhizome uncovered. Gently press the soil around the rhizome and water it in well.
Hold off the watering until you see some growth, and then water regularly — weekly, or as needed.
Do Iris Bulbs Need to Be Soaked Before Planting?
No, iris bulbs don’t need soaking before planting; just water them well after planting. However, rhizomes benefit from a few minutes of presoaking. One particular rhizome specie, the Siberian iris, should be soaked for 12 hours. This is because rhizomes are purchased dry, so they need rehydration before planting.
Where’s the Best Place to Plant Iris Bulbs?
A sunny spot with 8 hours of sunlight is ideal for planting iris bulbs. Irises don’t like shading from taller plants either, so the best spots are borders around flower beds, open spaces in the garden, or where they can be planted in a separate bed. Japanese irises also grow well near ponds.
Wherever you decide to plant your irises, make sure the soil is fertile and well drained. Irises can grow with wet feet but don’t like constantly soggy conditions.
How Many Iris Bulbs Can You Plant Together?
The bulb placement should be according to the type of specie and their growth habit. For example, dwarf iris species, like Dutch iris, grow 8-12 inches tall with a 6-8 inch spread.
So, the bulbs can be placed 8 inches apart. On the other hand, species like Tall Bearded iris and Louisiana iris can grow more than 2 feet with an 8-10 inch spread, so they need more space. Usually, 2-3 bulbs are grown closer in a circle with a 12 to 18 inches of distance between the planting holes.
Irises also spread through rhizomes and can crowd areas quickly, which isn’t favorable for their growth. So you have to take that into account too. Start the plants at an appropriate distance and thin them out every few years to maintain the desired spacing.
How to Grow Irises
Irises are perennial plants that come back year after year and spread quickly. They’re easy to grow and don’t require much maintenance.
All you need is full sun, well-drained soil, and some patience, and you’ll have beautiful blooms over the years. If you want to grow these beauties in your garden, here’s the guide from plantation to maintenance.
Iris Season
Iris plantation season starts in July when the average temperature is between 40 and 50 degrees Fahrenheit (4-10˚ C). But you should start the soil preparation in spring (helpful for growing other plants too). Remove any leftover mulch and old foliage from the previous year. If you have compacted soil, loosen it up with a shovel or spade. You can also add an all-purpose fertilizer at this stage.
Irises grow from bulbs or rhizomes bought from nurseries. You can plant them directly on the ground or in containers. As we mentioned, the best time to plant Iris is between July to September, but if you need to plant them earlier or later, that’s okay too. It’s better they stay in soil than out of it.
Planting
When you’re ready to plant, dig 5-6 inch deep holes for bulbs and 4-5 inches deep for rhizomes. Depending on your preference, you can plant irises in groups of two or three or in a single row. Just make sure the planting holes are 12-18 inches apart from each other.
For bulbs, cover them with soil completely. For rhizomes, place them vertically with the top of the rhizome uncovered. Rhizomes need basking in the sun for proper growth. Water the area well after planting.
Plant Care
The new growth should appear in a few weeks. Once you see the new sprouts, water them regularly, but reduce the watering as the winter approaches. Do not overwater as it can lead to root rot.
Irises planted in late summer start to bloom the next spring, and those planted in fall bloom in late summer. The flowering season of irises is short, about 2-3 weeks.
After they’re done blooming, cut the dead flower stalks about 2-5 inches from the base. Leave the healthy foliage as it is. It helps the plant store energy for next year’s growth. Taller species may also need staking, especially if grown in windy areas.
Irises aren’t heavy feeders, but you can add an all-purpose fertilizer (on Amazon) after they bloom, especially if you have re-blooming Irises.
You do not need to divide Irises for the first few years. But after that, dig up the clumps and divide them in early spring. This will help the plant to grow and bloom better. If your plants have suffered frost damage, cut the dead foliage to the ground just above the rhizome. Add a thin layer of soil and evergreen boughs over the rhizomes if you live in an area with harsh winters.
Issues to Watch Out For
A particular pest, the iris borer, can take over if dead foliage is not removed in time. It lays eggs on the dead leaves in fall, which hatch in spring. So, getting rid of the dead leaves as soon as possible is important.
Other than that, root rot is common in Irises, especially if the area is too wet. If you spot any of these problems, remove the affected parts immediately.
Are Irises Easy to Grow?
Irises are beautiful and low-maintenance plants perfect for beginners. Once planted, they will come back year after year for 20 years or more with very little care from you. They are tolerant to various conditions, including poor soils, and will even grow in full sun or partial shade.
They don’t need much fertilizing either. You can grow irises easily if you’ve got a spot that gets at least six hours of sun a day.
There’s just one important thing to keep in mind: Irises need regular pruning to stay healthy. They become prone to pests and diseases if you don’t remove the dead leaves and spent flower stalks in time.
You’ll also need to thin out the clumps every few years to keep them from overcrowding. Apart from that, these hardy plants are relatively easy to grow and make a great addition to any garden.
Do You Cut Back Irises for Winter?
Yes, it’s important to cut back the iris plant for winter because even a mild frost kills the iris foliage. So it’s best to remove it before that happens. Cutting back also saves the plant from pests that lay eggs on the dead leaves in the fall. These eggs hatch in spring and can damage the plant.
Another advantage to cutting back is that most species of iris bloom only once a year. After the bloom dies, it leaves behind spent flower stalks that look unsightly and sap the plant’s energy. So, it’s best to remove them to encourage the plant to conserve energy for next year’s growth.
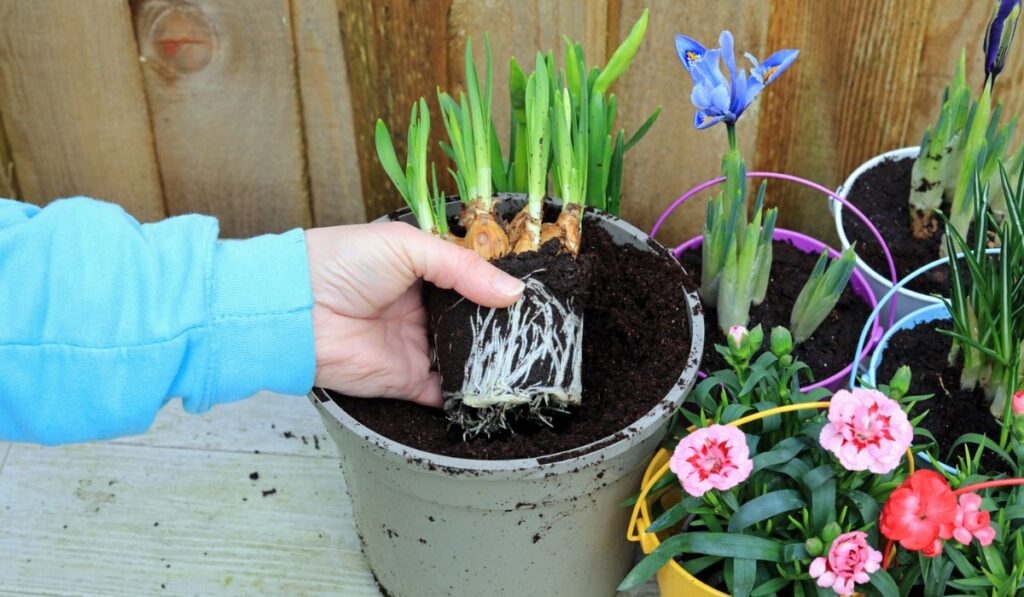
Can Irises Be Grown in Pots?
Yes, irises can be grown in pots as long as the pot is big enough. For dwarf varieties, an 8-inch pot is sufficient. But for taller species, you’ll need a pot at least 12 inches deep and 12 inches wide. Irises don’t like soggy soil, so make sure the pot has good drainage. You can add a layer of gravel at the bottom before adding soil to improve drainage.
It’s best to plant irises in pots in fall; plant with the same technique as you would in the ground. Keep the pot outdoors for the first few weeks, then bring it inside after the first fans appear. Place the pot in a bright, sunny spot until the weather warms up. You can then put it back outside.
Irises grown in pots will need to be divided more often than those grown in the ground. So, every year, or every other year, lift the entire plant out of the pot and re-pot it with fresh soil.
Common Iris Pests and Diseases
Irises are relatively pest and disease-free if they remain in the sun and in well-drained soil. But if the conditions are not ideal, they can fall prey to pests, rot, or fungal diseases.
Here are the most common problems you may encounter while growing Irises:
Pests:
- Iris borer: A hard-to-spot, but destructive pest, the iris borer causes extensive damage to the plant by tunneling through the leaves and stem. Removing the affected parts and squashing the larvae is the only way to get rid of them. You’ll need to throw the plant away if it has damaged rhizomes.
- Aphids: These tiny pests suck the plant’s sap, causing leave drop, stunted growth, and distorted blooms. To get rid of them, hose the plant down with water or spray an insecticidal soap solution (on Amazon).
- Flag Weevils: These pests damage the plant by feeding on the leaves, flowers, and seeds. They populate in seed pods, so remove the pods from infected plants.
- Thrips: These tiny black or brown insects cause stunted growth and distorted blooms. If not controlled in time, they can damage the entire plant. The best way to get rid of them is to spray an insecticide.
- White Flies: These pests stick to the underside of leaves and suck the plant’s sap. They cause stunted leaves and yellowing of foliage. Whiteflies are difficult to get rid of. Cut off infected foliage, use insecticide and try removing the flies with a vacuum.
- Slugs/Snails: These slimy pests damage the plant by eating leaves, flowers, and stems. The best way to get rid of them is to set up traps or handpick them.
- Verbena Bud Moth: Larvae of this moth bore tunnels into the plant’s buds and flowers, causing them to drop off. You can get rid of them by removing the affected parts or handpicking them.
- Follar (Nematode): A follar attack is devastating for every part of the plant, from leaves to roots. The only way to save the plant is to remove the affected parts and throw them away.
- Root Knot: This is a nematode that causes galls on plant roots that lead to stunted growth. The only way to remove them is to dig up the plant. Disinfect the tools you used.
- Stem Bulbs: This is another nematode attack that causes swollen stems and distorted blooms. The presence of nematode wool is a dead giveaway. If you spot this, immediately uproot the infested plant along the plants in its 3-foot radius and disinfect the area.
- Root Knot: This is a nematode that causes galls on plant roots that lead to stunted growth. The only way to remove them is to dig up the plant. Disinfect the tools you used.
- Stem Bulbs:This is another nematode attack that causes swollen stems and distorted blooms. The presence of nematode wool is a dead giveaway. If you spot this, immediately uproot the infested plant along the plants in its 3-foot radius and disinfect the area.
Diseases:
- Bacterial Soft Rot: Caused by bacteria entering through plant wounds, soft rot can be spotted by wilting yellow leaves, foul odor, and rotting of rhizomes. You’ll have to dig up the rhizome and cut away the affected parts.
- Virus attack: Viruses cause stunted growth, yellowing, and mottling of leaves and brown spots on flowers. There is no way to cure them, so uproot the plant.
- Bacterial Leaf Spot: These spots are water-soaked and cause the leaves to drop off. It can be avoided by not watering overhead.
- Fungal Leaf Spot: These spots appear as black or brown patches under leaves and cause them to drop off. It causes fuzzy growth, leaf death, and overall weak plants. The cure is to remove the infected parts.
- White Mold: Caused by fungi, white mold is characterized by a white powdery growth on the plant. It can be controlled by removing the affected parts and increasing air circulation. If this happens, disinfect the soil to at least 8 inches deep.
- Ink Spot: This is a fungal attack that causes reddish black powdery spots on leaves. Sometimes, it’s also visible on rhizomes. Remove the affected parts and increase air circulation.