
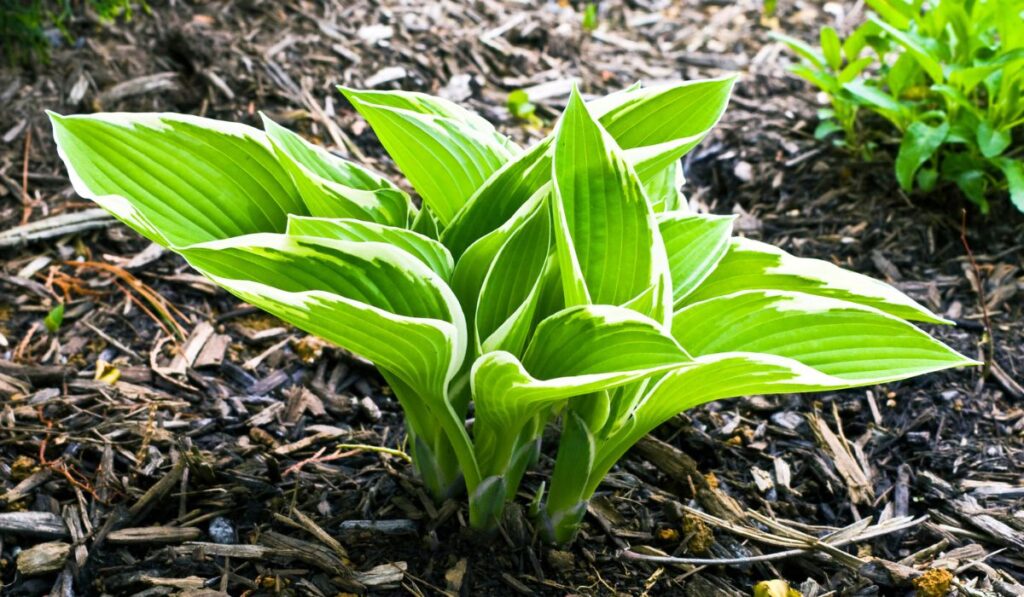
Beginners and seasoned gardeners can enjoy hostas’ many options in color and texture. They are easy to care for and look great in many gardens and pots. In mid to late summer, they sprout various purple flowers that can be used in floral arrangements or enjoyed outside.
Hostas prefer partial to full shade and constant moisture when newly planted in the spring or autumn. They can come in miniature, medium, and large sizes with varying leaf and bloom colors that can be propagated by cutting the plant in half.
Hostas are popular in many different gardens with their many colors and ease of care, and you almost always see at least one of them in a yard. Growing and caring for hostas can be easily achieved, even if your green thumb is lacking.
When to Plant Hostas
The best time to plant hostas is in early spring or early fall. The trick is to get your hostas planted before the rainy season to help hydrate the new roots.
If you plan to plant in the fall, you need to wait until the summer heat has ended or risk the new plants getting scorched, though you also need to give them enough time before the first frost.
If you need to plant hostas in the summer, it is not impossible, just tricky. They will need extra watering and shade to ensure they don’t die from the high heat.
Different Types of Hostas
There are wide varieties of hostas, some small and some that grow up to 6 feet wide. Determining which is best for the space can be difficult, given the many options, but here are a few of the most popular varieties.
- Aureo Marginata: These have deep green oval-shaped leaves with a white or golden edge.
- Blue Cadet: A smaller hosta with heart-shaped leaves that come in a deep green to a bluish color. Great for a border or edging plant, and blooms mid-summer with purple flowers.
- Cracker Crumbs: A miniature, fast-growing hosta with pointed leaves in lime green with dark green edging. Blooms with dark purple flowers.
- El Nino: Medium-sized hostas with large pointed leaves that look thick and cushioned. They are a dark smokey blue with white edging and lilac flowers in the summer.
- Frosted Mouse Ears: Another miniature hosta with thick curled leaves that appear dark green in the middle and light green around the edge.
- Revolution: A large hosta with broad white leaves and dark green edging. Lilac-mauve flowers bloom mid-summer.
How to Plant Hostas
Planting this hardy perennial is incredibly easy to do. However, you must first figure out how big the hosta will grow. The best place to find that information is on the plant tag that comes with the plant when you purchase it.
It could take a few years for the hosta to reach its maximum size, but knowing the size the plant will get will ensure you can properly place it.
When you go to plant, you want to place the root ball at the same depth in the soil as in the pot to ensure proper coverage. Afterward, water thoroughly to properly hydrate the plant and minimize shock.
Where to Plant Hostas
Sunlight is the first criterion for choosing where to plant your hostas. Hostas flourish in partial to full shade, but some varieties, like August Moon, Honeybells, and Sun and Substance, can tolerate a sunnier area.
The soil that hostas do best in is fertile and full of organic matter. Avoid planting them in heavy clay or sandy soil. One won’t offer enough drainage, and the other will provide too much drainage.
If planting hostas in garden beds, mix an all-purpose soil fertilizer (on Amazon) in the first 6 to 8 inches of soil.
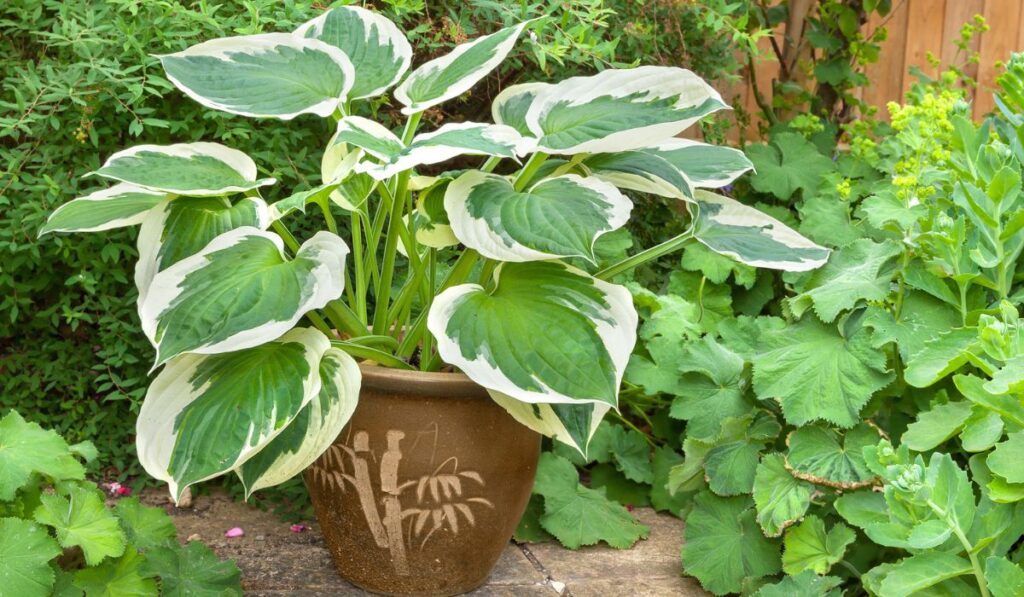
For planting in a container, you want to determine how large the hosta will become and plant in a container accordingly. A good rule of thumb is to use a pot 2 inches larger than the plant’s container. Anything bigger and there will be too much water in the soil, and it will drown the roots.
Watering Hostas
During the first growing season, hostas must maintain constant moisture while they are getting established. You don’t want the soil to dry out completely, but you also don’t want to keep it wet, as that will kill the roots too.
Check the soil weekly or every couple of days during the summer, and water your hostas when the top inch is dry.
Once the plants are established, they can survive on the rain unless there is a drought. The only exception to this rule is if you plant them under a tree, as the tree roots will sap all the moisture, so it’s important you still regularly water your hostas.
If you have a larger variety of hostas with a canopy of leaves, ensure you water the roots, as the leaves will prevent moisture from getting to the root ball.
Mulch
Applying a 2 to 3-inch layer of mulch over freshly planted hostas is essential to help seal in the soil’s moisture. Mulch is also beneficial to help prevent weeds from growing as it blocks the dirt from the sun so they can’t sprout. Good mulch contains shredded leaves, pine straw, and wood chips.
Propagating Hostas
Since hostas can get wide quickly, you might want to break up a larger bush into smaller plants to plant them around different gardens. To do so, lift the plant in autumn or spring with a garden fork. Make sure you don’t damage the growing stems or the root ball when doing so.
Place the plant on a flat, solid surface, and cut it in two using a sharp knife. If the plant is large, you can cut it further, but ensure you have at least two healthy shoots on each section.
Sometimes, depending on the variety of hosta you are propagating, you can gently pull the roots apart into two different divisions rather than cutting.
Once you have your two divisions, you should immediately plant the parent hosta and the other sections back into the soil. They will have a bit of shock and need the earth to establish once more and maintain good moisture levels.
Hostas growing in containers should be divided every three years or transferred to a larger pot to maintain the plant’s health.
Maintaining Hostas
Having hostas is incredibly easy that both beginner and seasoned gardeners can enjoy, yet like any plant, they still require some care to keep the plant healthy and happy.
The first thing that needs to happen a month after planting is fertilizing. You can use an all-purpose fertilizer (on Amazon) and follow the instructions on the label.
After that initial fertilization, you should continue doing so every three months during the growing season, typically April until September, depending on your location and weather.
Remove any faded or spent leaves at the end of the growing season, usually autumn, to help the plant survive winter, prevent pests from eating it, and get shelter during the colder months.
Using Hostas
Hostas offer a few beneficial uses rather than just a filler in your garden. For instance, they attract hummingbirds with their mid-summer flowers and offer them food. Hostas also make an excellent ground cover or hedge plant, and a row of them can help bring a nice touch to a fence line, skirt a tree or edge a driveway.
Their mid-summer flowers offer a great addition to floral bouquets; some are even fragrant, like the Ming Treasure hosta. An arrangement of different colored leaves can provide an attractive piece if you have different kinds of hostas as well.
Young hostas are also edible, a fact most people don’t realize. In Japan, they are boiled, fried, or even eaten raw. They taste like lettuce and asparagus, and who doesn’t want to eat fresh from their garden?
Pests And Prevention
Like any plant, disease and pests come with the territory. Some things are preventable before they occur with the proper care and preemptive thinking. Other times it’s about managing nature and its superb additions to any outside garden.
- Slugs and snails: You have slugs if you see irregular holes in the leaves. You can place some pet-safe slug baits and traps (on Amazon) to help reduce the population, but it is hard to eradicate them unless you buy a pesticide.
- Deer, birds, and critters: Hostas are a favorite snack of deer. To stop them from chewing on your plants, try using fencing or motion-sensitive sprinklers to ward them off. If other critters and birds are feasting on your hostas, apply some bird netting over top. You could also try some deer repellent (on Amazon) with oils animals don’t like.
- Anthracnose: A disease that shows up in warm and humid weather. It creates big, irregular spots with dark borders on the leaves, making them look shredded. To avoid this problem, space your hostas appropriately apart.