
Garlic is an easy crop to grow and harvest and is used in various culinary dishes. It’s very popular, and you can get away with only ever having to buy cloves once since you can replant your harvests each year. You can even sample a variety of different cloves to find your favorite.
Garlic is planted in the fall and mulched for winter. In spring, fertilize with phosphorus and water consistently until July, then taper off. Scapes need to be cut off hardneck varieties, and you’ll know the crop is ready to harvest when the outer bulb wrapper is thick and papery.
Garlic is used in so many dishes that it’s no wonder many people take to growing their own. Not only does it cut down on cost, but the flavors and variety of garlic you can plant are more than any store can offer. In addition, with next to no pests, garlic is easy to plant and maintain to reap a big harvest year after year, using the same cloves you grow.
When to Plant Garlic
Fall Planting
Garlic bulbs (on Amazon) should be planted in fall, between late September and November, to give the plants a headstart on the growing season in summer. Generally, like onions and other Allium family plants, it is best to plant garlic after the autumnal equinox in late September, roughly 6 to 8 weeks before the first frost.
The bulbs do best if they experience a dormant period throughout winter when the ground reaches about 40 degrees Fahrenheit or 4 degrees Celsius for 4 to 8 weeks at a time.
Over the fall months, they have a chance to develop a healthy root system, and by the time spring rolls around, it will be able to produce a good amount of foliage. However, garlic is sensitive to the length of sunlight and matures during the longest days of summer, so planting it in fall will be the first crop to come up in spring and offer it the longest duration to mature over summer.
Spring Planting
You can also plant garlic in the spring between late February and March in milder climates. However, the bulbs will not grow as big as if planted in the fall because they do not have that long time to develop a root system.
The scapes, which will still grow in the summer on hardneck garlic, will offer a mild garlic taste to your dishes.
Different Types Of Garlic
Hardneck Garlic
Hardneck garlic (on Amazon) is exceptionally cold-hardy and is suitable for people in harsh winter climates. They produce scapes, the garlic flower and have a mild garlic flavor that can be added to many culinary dishes.
These scapes need to be removed for the plant to produce large bulbs, or it will use its energy to maintain these flowers instead.
Hardnecks grow one ring of large cloves around a hard stem but do not store as well or as long as other garlic varieties. The flavor of hardneck garlic is much milder than softnecks, with common types being Korean Red, Duganski, Siberian, Music, Chesnok Red, German Red, Purple Stripe, and Spanish Roja garlic.
Softneck Garlic
Softneck garlic (also on Amazon) has necks that remain soft after being harvested and are often seen braided together for storage. Softnecks do better in warmer climates and are less winter-hardy.
They are strong and intense in flavor and tend to grow bigger bulbs since there is no scape that takes away the plant’s energy focus. Some softneck garlic varieties include Silverskin, Inchelium Red, California Early, and Artichoke garlic.
How to Plant Garlic
Preparing Garlic for Planting
Garlic is one of the easiest crops to grow; it all starts with the seed. Planting quality seeds or cloves will then produce quality crops. With several different varieties, you have a ton of options to decide which is best for your garden and culinary needs.
- Choosing a location in full sun offers the best growing condition for garlic, with an average of 6 to 8 hours of sunlight per day.
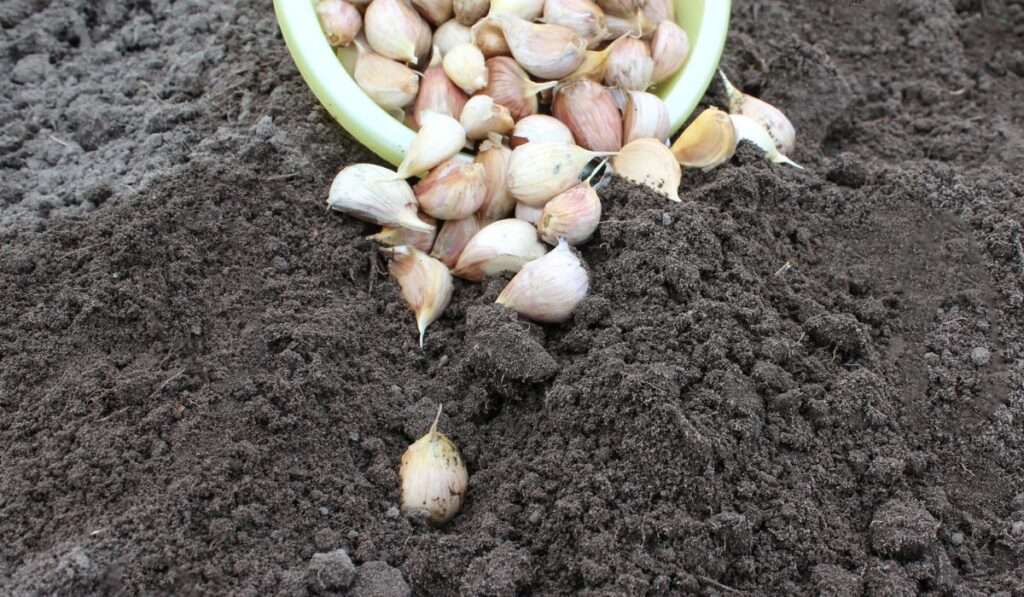
- When planting garlic, the first thing to do is to separate the cloves within 48 hours of planting. This keeps them from drying out, which can happen if you separate them too far in advance.
- A good rule of thumb is that the largest cloves will produce the biggest bulbs, so try to plant your decent-sized cloves over the smaller pieces.
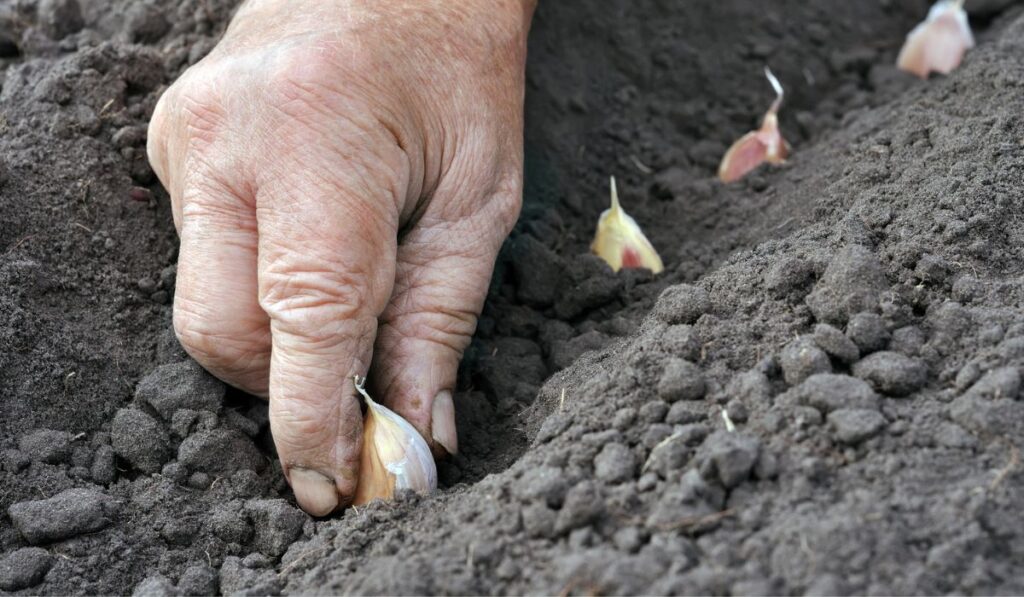
- Plant the individual cloves, with the peels intact, and the pointy end up. You want them about 2 inches deep and 6 inches apart so they don’t overcrowd one another, which can lead to disease.
Best Soil and Fertilizer for Garlic
Soil
Choosing the best soil mix for garlic can be the difference between a successful crop and harvesting nothing. The soil pH needs to be between 6.4 and 6.8 for optimal growth of the garlic bulbs.
Also, well-draining soil is vital, or you risk the cloves rotting since they are grown underground. This is especially important if you are in an area that receives a lot of precipitation during winter.
If your soil is poor draining or has a high amount of clay, it is advised to plant garlic in pots or heavily mulched raised garden beds to fill it with the soil needed. A traditional raised garden bed should be about 2 to 3 feet wide and 10 to 12 inches deep.
On top of well-draining soil, garlic requires a heavy fertile soil that can support tall plants and expanding heads during the spring and summer months. It’s recommended to mix high-quality potting soil with compost at a 75:25 ratio, which is 3 cups of potting soil to 1 cup of compost.
Fertilizer
Once you have your potting soil and compost mix, it is time to look at fertilizers. Since garlic is a bulb plant, it requires a little more phosphorus than the average plant. To achieve this needed nutrient, mix 2 to 3 tablespoons of granular organic fertilizer (on Amazon) specifically made for bulbs.
If you don’t want to purchase commercial fertilizer, you can always use bonemeal or fish meal instead. Then, use a trowel or small shovel to mix the fertilizer and distribute it evenly throughout the soil.
Mulch
After planting your garlic in well-draining soil, mulch the area with about 5 to 8 inches deep of seedless straw. This will pack down over the winter months to about 2 inches come spring.
Not only will this protect your plants from the harsh winter, but it will also provide ground cover to prevent weeds from overgrowing your garlic bulbs.
Over the fall months, your garlic will establish a root system, but no growth will appear above ground, so don’t worry. Once the last frost has passed, carefully remove the mulch. Come spring, your patience will be rewarded, with tiny green shoots being one of the first things to arrive after the ground thaws.
Maintaining Garlic Plants
Fertilizing
Caring for garlic does come with some maintenance work in the form of regular fertilization. You will need to fertilize the plants every other week with a liquid fish emulsion fertilizer (on Amazon) from when the shoots first emerge in early spring until about June 1.
In early spring, you will also need to fertilize them with blood meal, pelleted chicken manure, or another source of nitrogen, and again in early May once the days start to lengthen and just before the bulb begins to swell. This may need to be repeated if the foliage begins to yellow.
Watering
Watering your bulbs is especially important when the bulb is forming in early summer. A good rule of thumb is to water every 3 to 5 days during bulb season, which occurs mid-May through June. With all the needed water, it is essential to weed the area continuously, so the garlic isn’t competing for space and nutrients.
If May and June are especially dry, it is imperative to irrigate roughly 2 feet down every 8 to 10 days, but once mid-June starts to approach, begin to taper off watering.
Scape
If you are growing the hard neck garlic variety, the plant will produce a seed stalk called a scape around the summer solstice. The scape is delicious with a light garlic flavor and can be used in salads, stir fry, soups, or scrambled eggs.
However, this scape should be cut off to encourage the plant to put all its energy into bulb growth. When the garlic flowers (the scape), it is best to leave one or two flower stalks standing to help decide when to harvest your garlic.
About four weeks before it’s time to harvest, the outer wrappers of the bulbs will begin to dry, and it’s at this point you will stop watering, generally in July. Too much water at this point in garlic growth will cause the wrapper to stain and mold.
Common Pests and Prevention
Garlic is generally pest free, but there are a few things that can ruin a crop.
Birds
Birds will take freshly planted garlic cloves right out of the soil. To curb this habit, cover the area with netting or horticultural fleece immediately after planting the garlic, and don’t remove it until the plants are at least 5cm tall.
Onion White Rot
Hard to detect until it’s too late; the first sign is yellowing or wilting foliage. Yet this doesn’t usually happen until harvest time. If you dig up the plant with a white fungus on the bulb’s base with tiny black growths, the bulb has succumbed to onion white rot.
Since it is a soil-borne disease, there is no cure, and it can last for years. Therefore, the best thing to do is to dig up all the affected plants, burn them (do not compost), and grow future allium family plants in containers.
Leak Rust
A fungal infection that’s common in wet weather. There is no cure for the orange pustule disease on the leaves during summer. The bulbs are still okay to eat but harvest the plant immediately to prevent further spread. Burn the plants (don’t compost) and avoid placing allium family plants in the same garden for three years.
Harvesting and Storing Garlic
Harvesting

The best time of year to harvest your garlic is at the end of July to early August when the lower third to half of the leaves have turned brown and begun to wilt, yet the upper leaves are still green.
Garlic does have a sweet spot for harvesting that can be tricky to figure out, which is where those flower stalks we left on come in handy on the hardneck varieties. If the leaves start to turn brown and the scapes (flower stalks) have uncurled and stand up straight, it is time to harvest.
Before you go ahead and dig up the entire crop, it is best to try one bulb at a time to be sure it’s ready. More often than not, people tend to dig up garlic before it’s ready, although some varieties tend to mature faster than others.
To know if this sample bulb is ready for harvest, the garlic head will be divided into thick cloves, and the skin covering the outside of the bulb will be thick and papery. If it’s too early, the wrapping will be thin and easily disintegrate, while if it is left too long, the bulb and/or skin will split apart.
After determining if the crop is ready, carefully dig up the bulbs using a garden fork. Don’t pull or yank the stems by hand to avoid damaging the roots or root plate. Instead, lift the plant and brush off excess soil but don’t remove any foliage or roots.
Curing
Hang the bunches of 3 to 4 newly harvested garlic in a cool, dry, shady place with good ventilation for about 2-4 weeks to cure. After the leaves, roots, and outer wrappers are completely dry; you can brush off the soil and trim the roots about ¼ inch. Cut the tops back roughly 1 to 2 inches above the bulb before storing them.
Storing
The optimal temperature to store garlic is 40 degrees Fahrenheit or 4 degrees Celsius at 65% to 70% humidity. You don’t want to store garlic in your basement if it is too humid or in the refrigerator. Hardneck garlic can keep for up to five months, while softneck garlic will keep for eight months.
It’s a good idea to save your biggest cloves for next year and plant them again in the fall. Some experienced garlic growers say that the crop will learn and adapt to your specific growing conditions and improve each year to give bigger and better bulbs.
Tips and Tricks
- Plant several different garlic varieties in case one does poorly.
- As garlic dries, the flavor intensifies, so ensure your garlic is adequately cured and stored for the best flavors.
- Sow oats into your garden beds from late August to September to provide natural mulch for your garlic so that the spring shoots won’t have a problem growing through.