
If you’re interested in growing cover crops in your garden, you’ve probably thought of picking red clover. It’s a unique cover crop with many nutritional benefits for other crops, livestock, and, believe it or not—even you! So, how do you plant and care for red clover?
You can plant red clover in 1/4 -inch deep rows in a well-prepared area or by directly scattering the seeds over tilled land. Subsequent care and maintenance involve watering the crops through drip irrigation and managing pests and diseases by discarding affected plants.
Before you reap the benefits of establishing red clover in your garden, you must understand how to grow the crop and use it for its intended purpose. Let’s get started so you know everything about growing this useful cover and forage crop.
What are Red Clovers?
Trifolium pratense, commonly known as red clover, is a perennial flowering herb of the legume family called Fabaceae, to which beans and peas also belong.
The plant is native to Europe, northwest Africa, and Western Asia but also is planted and naturalized in North America and other regions.
What is it Used for?
Red clover (on Amazon) has many uses that will benefit any gardener, and home gardeners often rely on it as a cover crop to prevent soil erosion.
You can also use it as a trap crop to lure pests away from food crops, the same way it attracts beneficial pollinators like bees, butterflies, and hummingbirds. In addition, livestock farmers often feed red clover to their animals as it’s rich in nutrients and grows fast.
Moreover, red clover is commonly used to repair compacted soils or those with inadequate nutrients like nitrogen. Remember, like most leguminous plants, red clover has root nodules that harbor nitrogen-fixing bacteria like the Rhizobium species.
The long, deep tap roots can burrow as much as 8 feet into the soil, loosening it as the plant grows and allowing proper air circulation. This makes red clover the ideal crop to establish in an area where you’d like to grow food crops.
How Do They Grow?
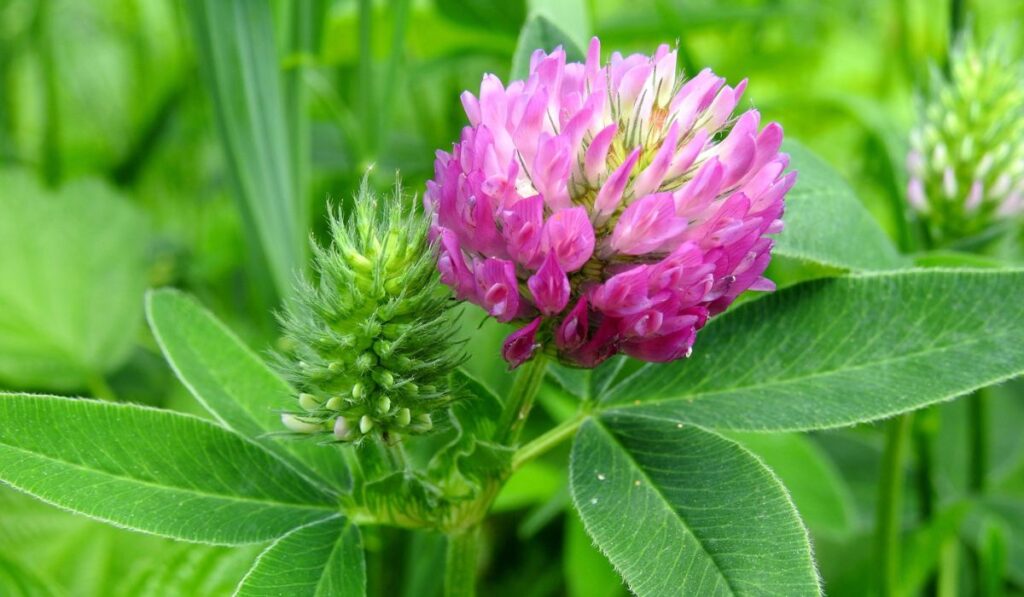
Regarding the growing size and pattern, red clover can grow prostrate or upright, reaching as much as 36’ inches (3 feet) tall. In addition, it can spread up to 2 feet wide, making it ideal for use as a cover crop.
The trifoliate leaves often have a white, V-shaped marking and are borne on green stems with tiny, fine hairs.
The flowers bloom in clusters, with tiny individual flowers ranging from 75 to 125 in each cluster. Understandably, the ‘red clover name’ is misleading since the flowers are usually more purple or pink than red.
What are the Varieties?
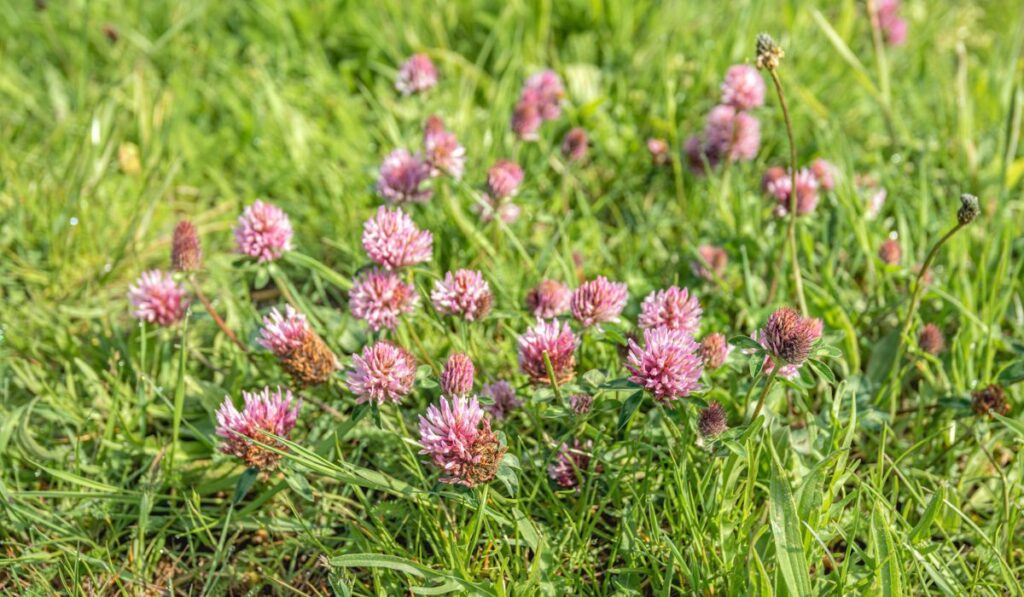
There are two main types of red clover grown in the US, the mammoth and medium varieties. The plant proliferates, often blooming in the spring and summer. Being a rapid grower sounds excellent in many cases, like when you want to feed the crop to your livestock.
However, the plant can quickly become invasive and spread out of control in some areas. Therefore, you might want to keep it in check and consider growing it in raised beds if your site already has plenty.
Many ask if you can plant red clover with the rest of your edible plants without choking them. Well, you can, and the leaves and flowers of red clovers are also edible.
So feel free to eat them raw or cook them like you’d prepare spinach or some other green, leafy vegetable.
What Climate Do Red Clovers Grow Best in?
Red clover does best in cool temperate climates and is well suited for USDA zones 3a-9a. The seedlings can survive temperatures as low as 18 ℉ (-7.7 ℃), but they require at least 59 ℉ (15 ℃) to germinate.
While the plants can tolerate partial shade, they do best in areas that receive at least six hours of full sun daily. They also require an annual rainfall of at least 700mm to be productive.
However, hardy varieties can withstand less moist conditions and still be productive in areas with an average annual rainfall of 600mm.
How to Prep Your Soil for Planting Red Clover
Red clover isn’t too picky on soil types, but you must ensure the soil is well-drained and free from weeds that would otherwise choke the plants.
You should prepare the soil well to give the seedlings an easy time sprouting and for the plants to grow well and thrive.
Create Rows
The first method you can opt for involves creating rows that are about 12 inches apart. You want to give the seeds an easy time germinating, so ensure the rows are no more than 1/4 inch deep.
You can then scatter the red clover seeds into the rows rather than poking individual seeds into the ground. Cover them lightly with soil, water them well, and give them time to germinate.
Till
If you can’t put up with creating rows and all that stuff, simply till the soil to work in dead crop residue and aerate the soil. Then, once you’ve disturbed the soil well, freely cast the seeds over the freshly tilled area and give them time to germinate.
How Long Does Red Clover Take to Grow?
Unlike most legumes, red clover germinates relatively fast, taking about 7-10 days to germinate. From then on, the seedlings take 60 to 70 days to grow and reach the point you can harvest them.
You can then schedule subsequent harvests at 30 to 35-day intervals o allow for three harvests in a year. As a rule of thumb, you should also ensure you harvest established red clover stands before they bloom or when they first bloom.
How to Care and Maintain Red Clover
Once your red clover seedlings have started to pop up, you can shift to long-term care and maintenance. Thankfully, the plants are pretty easy to maintain, and here’s what to know about doing it correctly.
Propagation
Being a short-lived perennial, red clover usually drops its seed faster, allowing it to come back year after year. But if you don’t want to wait for reseeding, you can collect the seeds from the flower heads by yourself and plant them.
Irrigating Red Clovers
While red clover is drought-resistant and can go for a few days without water, it does best where the soil is consistently moist.
The best way to water the plants is through drip irrigation, so the leaves and flower heads don’t get wet. Otherwise, they’ll easily get infested with pests and diseases.
If you prefer overhead irrigation, do it in the early morning so the water can evaporate off the plant surfaces during the day. However, be careful not to keep the soil too wet, as it could lead to root rot and kill the plants.
The leaves usually turn brown or yellow if you water the plants too little or overwater them. Adjust how much you water them if you suspect you’re getting it wrong based on the leaf color.
Fertilizing
Since red clover is naturally nitrogen-fixing like other legumes, you won’t need fertilizer unless your soil lacks nutrients.
Testing the soil is the best way to know which fertilizers to use. But in general, you can apply 20-60-40 fertilizer at the time of sowing. A yearly application of diluted 0-30-90 can also help once the crop is established.
Managing Pests and Diseases
Red clover is susceptible to a few pests and diseases, and they often don’t have a cure. Some incurable diseases include stem rot, powdery mildew, Northern anthracnose (clover scorch), and sclerotinia crown.
Also, the pests that commonly affect red clovers include meadow spittlebugs and the clover seed midge. The best way to deal with affected plants is to dispose of them as soon as possible.
Do not compost them, or you’ll take a toll on the healthy growth of future crops.
Mowing and Terminating the Crop
Mowing and terminating red clover is a critical part of caring for the crop; how you do it depends on the variety of red cover you’ve planted. What stands out, however, is that missing the termination window would allow the crop to seed and regrow in unwanted places.
If you have mammoth red clover, you’ll only cut it once when it starts to bloom.
Then, mow down the crop with your garden tiller or lawn mower and leave it on top of the soil to decompose and fix nutrients.
If you choose the medium variety, you can mow it several times. For example, mow the crop towards the end of the fall if you planted them during the season. Alternatively, mow in early spring or at the end of the spring to terminate the plants.