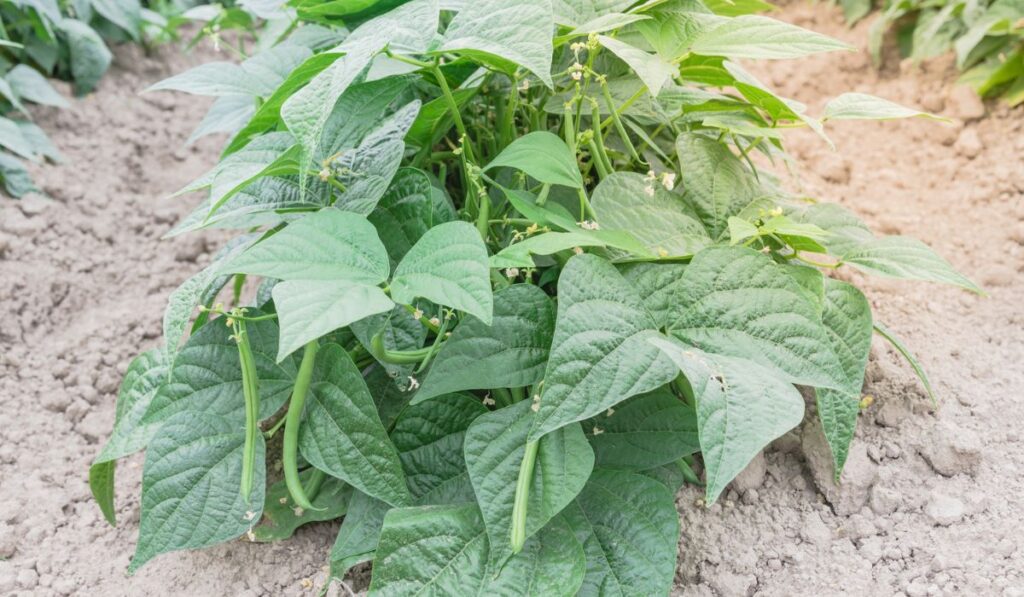
Are you a bush bean lover and want to see them nourishing in your garden? If the answer is yes, you are reading the right article. This guide has everything you need to know about when to plant bush beans.
The best time to plant bush beans is after the last frost when the air and soil temperatures are between 65 and 85 degrees Fahrenheit (18-24 C). Bush beans should be ready to harvest in about 2 months. Plants should have around 4in free on each side (so plants should be spaced about 8in apart).
Beans can be grown in your vegetable garden in a wink and are also good for your soil! Adding nitrogen to your soil benefits legumes, such as beans and the rest of the legume family. As a novice gardener, bush beans are one of the most significant crops. So, let’s find out when and how to plant bush beans!
When to Plant Bush Beans

When it comes to beans, frost can be a real problem. Germination occurs best at a soil temperature of 25°C (77°F). Ten days before your last frost, you can directly plant bean seeds in your garden. Consider buying a soil thermometer such as Luster Leaf 1625 Digital Soil Thermometer (on Amazon) to check soil temperature.
Full sun is required for these plants, which in most places translates to six to eight hours of direct sunlight each day. Most garden crops can handle shade, but bush beans thrive best when grown in full sun. In addition, planting in 10-day intervals will give you a higher, more consistent yield throughout the season.
Certain types can be harvested in just 50 days, but 60 days is more usual for most. Sow seeds every two weeks until two months before the first fall frost to extend the yield. Late-day watering helps to dry off the leaves. The weekly watering should be between two and three inches deep.
How to Plant Bush Beans
Bush beans need at least six hours of direct sunlight each day, so plant them where there is enough. Bush beans thrive in organically rich, well-draining soil.
A typical germination time for these seeds is 8-10 days. However, germination can be delayed by up to two weeks if the soil temperature is below 60°F at the planting time.
To plant bush beans:
- Sow seeds three inches apart, one inch deep, when you’re ready to plant. Between 18 and 24 inches apart, rows should be spaced. Plant seeds 3 inches apart and at least 2 inches away from the pot’s side if you use containers.
- Fill in the holes you made with your finger by poking them about an inch deep in my dirt, sowing one seed into each one.
- After you’ve placed your seeds, carefully pat the dirt around them. Ensuring the seed is in direct contact with the soil increases the likelihood of germination.
- Water your newly planted seeds using a sprinkler on your watering wand or hose attachment.
Sowing seeds in a container for eventual transplantation into the garden might be problematic because of the sensitive root systems of bush beans, which are grown in containers all season long.
Harvesting Bush Beans
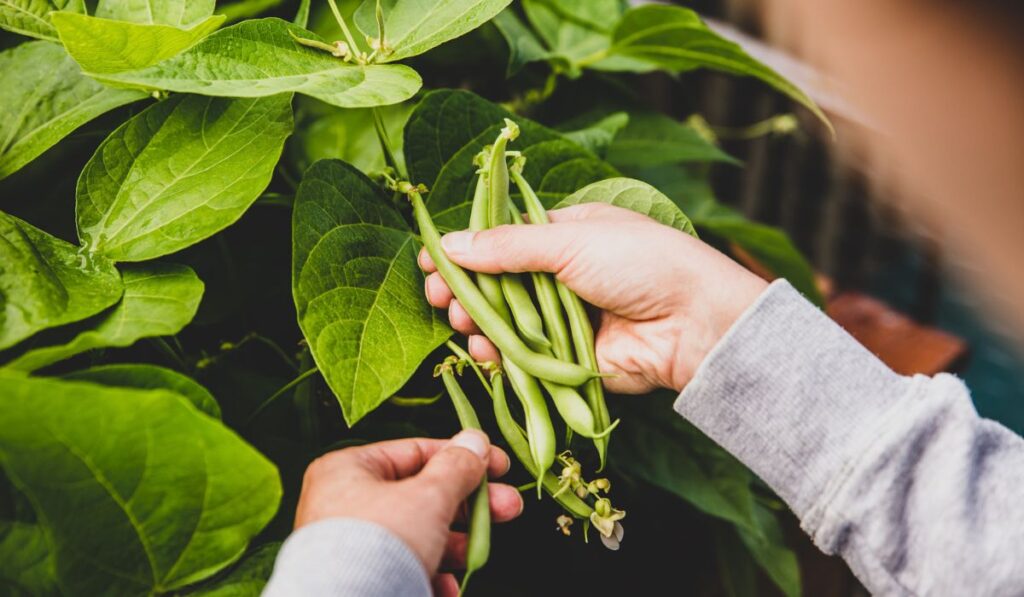
Bean harvesting is a continuous operation. You can begin harvesting at any time, but most gardeners wait until the beans have hardened and can be snapped before doing so. Then, they’re roughly the same thickness as a pencil.
As long as the pods are large enough to consume, beans can be collected from the plant. Generally, smaller beans selected earlier have a higher level of tenderness. In the wild, bush beans can be expected to yield for two to three weeks at a time.
By Hand
If you’re planning to use the beans immediately, you can either break the vine end off or delicately pull each bean off the vine. Beans can turn rough and overgrown in days if you wait too long.
Harvest beans every few days during this time. Astonishingly fast pods will spring up out of nowhere. Avoid harvesting beans while the leaves are still moist, as this could increase the risk of illness.
Pick the beans frequently to prevent the plant from ceasing to flower if the pods become overstuffed with seed. The product becomes more delicate as it grows in size.
Using Machines
Mechanical harvesters can either be towed by a tractor or driven by themselves. One row can be picked with a picking head that is 10 to 15 feet broad. Bean pods are stripped from vines by opposing brushes, leaving plant stems behind.
Separators remove leaves and debris from the beans before they enter the container. Shelled bean harvesting machines combine harvesting with shelling.
Storing Bush Beans
Protect beans from the sun and heat by storing them loosely in containers. Field and bean respiration heat necessitates rapid and complete chilling. Refrigeration preserves the quality and extends the shelf life of food. The size of the farm has a significant impact on the methods used.
Consider the following options for keeping bush beans:
- Beans can be stored in the refrigerator for up to four days in an airtight container.
- The toughness of beans will increase over time, even if they are carefully preserved.
- The blanching and freezing process can also be done soon after harvesting.
- Canned or pickled beans can also be used.
Maintaining Bush Beans
You don’t need to give your beans special attention as long as they have everything they need to thrive. Therefore, let’s run through the list of everything you require for proper growth.
Sunlight
In the hottest months, beans need a lot of sunlight to thrive, which is applicable even if it’s cloudy. So you’ll get the best harvests if you ensure they get at least eight hours of light each day.
Temperature
Seed germination is reduced when the soil temperature drops below 60 degrees Fahrenheit. Young plants, on the other hand, can tolerate colder temperatures. Beans thrive at a temperature range of 70 to 85 degrees Fahrenheit.
Flowers will begin to fall off vines, and your bean pods may not grow if the temperature rises to 90 degrees. Therefore, planting your beans early in the year ensures that you will have a harvest before the summer heat is at its worst.
Soil
A sandy or silty loam is suitable for growing beans. Modifying clay soils to break up the soil and provide breathing areas for the roots is necessary. Compost or other organic material can help prevent clay-like soils from being compacted around the roots of your plants.
In the same way, you want soil that drains quickly so that water doesn’t accumulate and drown your plants.
Watering
To ensure that the crop receives a consistent amount of moisture, water the garden. Watering the garden early in the day provides the leaves completely dry before dusk. A 6-inch depth of soil should be moistened with water.
As a result, watering less frequently but deeper will create a more robust root system for the plants. During pod set and pod development, moisture is crucial.
Fertilizer
Prepare your garden bed for planting by covering it with a thick layer of compost or well-rotted manure a few weeks before you plan to plant. It may not be necessary to apply more fertilizer to beans throughout the growing season because they are not heavy feeders.
Organic fertilizer with higher phosphorus and potassium levels than nitrogen can be applied once the plants bloom and start producing bean pods.
Tips on Caring for Bush Beans

- Apply fertilizer along the rows before the first bloom if the soil is poor and development is slow.
- As soon as possible, get rid of the weeds.
- It is best to water the beans on bright mornings to prevent disease.
- In the evening, avoid watering. If at all feasible, water the plants at their base.
Common Pests and Prevention
There are a lot of illnesses that can affect beans, and once they become established, they are hard to eliminate. Preventative measures are essential. Develop a garden of disease-resistant plants and flowers. Use caution when watering the plants. Plants need plenty of room to spread out. Every few years switch crops.
This type of bean is usually resistant to many diseases, although it does have a few diseases that are particularly relevant to bush beans.
These include bean mosaic, a disease that causes the plant to turn a variety of green-and-off-yellow colors, causing the plant to roll up and the leaves to wilt and die, destroying the bean plant.
